

I have adapted Ruth's Google Form method from Chapel Hill Snippets (check out her great tutorial) just a bit to make my forms a little more universal. This works great for me since I use my Google Drive for EVERYTHING. It's so useful for managing my documents and data from any location or device.

Yield: 60+ individual student forms and spreadsheets full of DATA!
1 gmail account
1 oz. of patience
a dash of creativity
Instructions:
1. Login to your gmail account and press "Drive" at the top of the page
2. Once you enter your Drive select "Create" and then press "Form" in the top left corner of the page

3. You will then be taken to a window prompting you to choose a title and theme. I like to use my student's name as the form title and something cute for the theme:)

4. Now time to create your form. This part is completely customizable (is that a word?), so I will simply show you how I have found that it works best for me. At the top of my form I include information such as:
Special Education Eligibility:
Related Services:
Current IEP Date:
Current MET Date:
5. For my first entry I want to record student attendance I find that this works best in the down menu (Question Type: Choose from a list).

Fill in required fields:
Question Title: Attendance
Help Text: Record Attendance
Question Type: Choose from a list
1. Present
2. Unable to Participate in Lesson
3. Student Absent
4. Clinician Absent
6. Once fields are complete press "Done" and your drop down will be created.
7. To continue, press "Add Item" near the bottom of the page

8. Repeat steps 5-7 to add additional information
Enter Target Objecitves:

Enter commonly used Activities and Interventions:

Enter Activity Comments (I like to use "Paragraph Text" so that I can enter specific information such as: iPad app used, title of story presented, target vocabulary...)

Enter Levels of Prompting or Cuing:
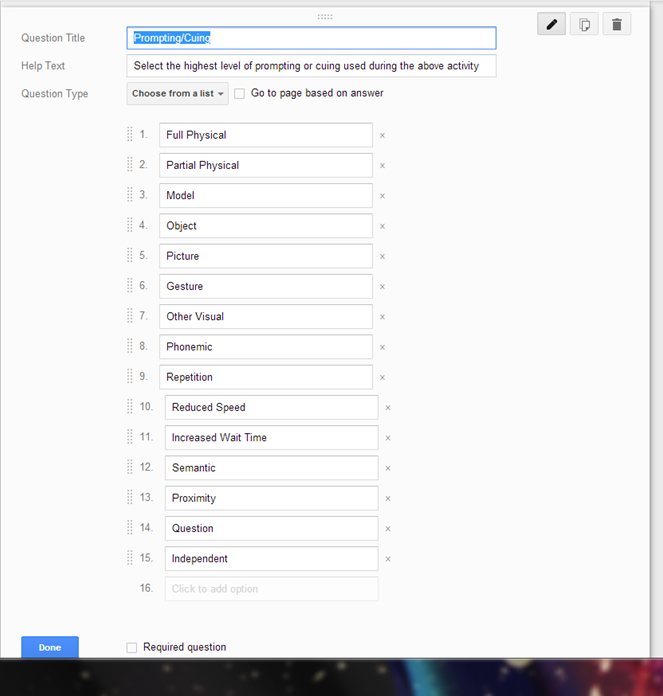
Enter Accuracy (I like to use "Text" so that I can enter an exact percentage):

Finally, I like to add a Paragraph Text to allow me to record any additional comments:

9. Time to send your form.

10. You will then be prompted to choose your recipients. I usually email the form for myself (and maybe the classroom teacher). This allows me to open the form on my PC to save the form to my desktop and on my iPad to save to my homescreen. I can collect data ANYWHERE!

11. Once to select "Done" you will be prompted to "Choose Response Destination." This is where your data will be collected nice and neatly once you press "Submit" on the bottom of your form. You can decide whether you would like to create a new spreadsheet or add a new sheet to an existing spreadsheet. Give your new spreadsheet a name (again, I use my student's name), click create, and Google will generate your sheet which will be saved on your Google Drive.


After 2 submissions, this is what my spreadsheet looked like:
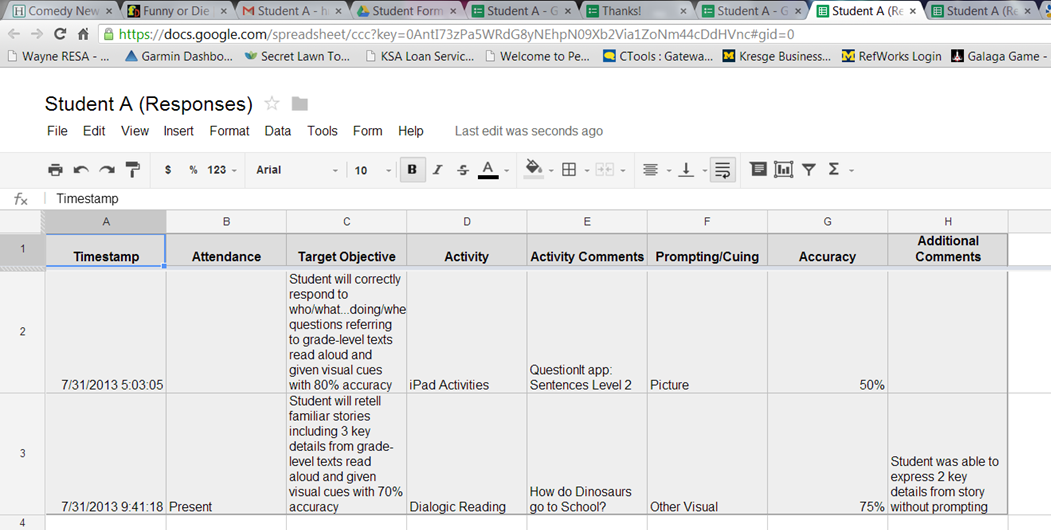
As you can see, Google created a timestamp when i pressed "Submit" on my form and organized all my data into a wonderful little spreadsheet. This really comes in handy when I'm ready to bill Medicaid (copy/paste).
12. One student down, 59 (give or take) left:) This is where a "universal" form comes in handy. It gives you a template that just needs to be slightly modified for each student. To do this, return to the student's form and click "File>Make a Copy"

13. You will then be prompted to name your new form (I usually use the student's name)

15. Make any modifications to personalize the form for you new student (i.e. target objectives, specific activities, specific prompts...).
16. Repeat steps 9-14 for all additional students on your caseload
Phew! I know that it may seem like A LOT of work up front, but once you get the hang of it, it goes quite smoothly. And trust me, it will save you lots of time (and trees) down the road!!


